
How to manage folders
On this page, you will find information on how to upload and import a folder into your X3 deployment using the X3 Cloud portal and your FTP connection.
How to import a folder
Prepare the ZIP file
Before uploading your ZIP file to the Full_X3_Import folder, make sure it follows the required structure.
For instance, for a folder named SEED, the ZIP file must contain:
-
SEED
-
<SEED folder content>
-
SVG
-
-
X3_PUB
-
SEED
-
GEN
-
RES
-
TMP
-
-
Upload the ZIP file
-
Prepare your folder in ZIP format.
-
Connect to your FTP endpoint (see Connect to an FTP).
-
Copy the ZIP file into the existing Full_X3_Import folder of the target X3 deployment.
Import your folder to the portal
-
Go to Deployments.
-
Select a deployment.
-
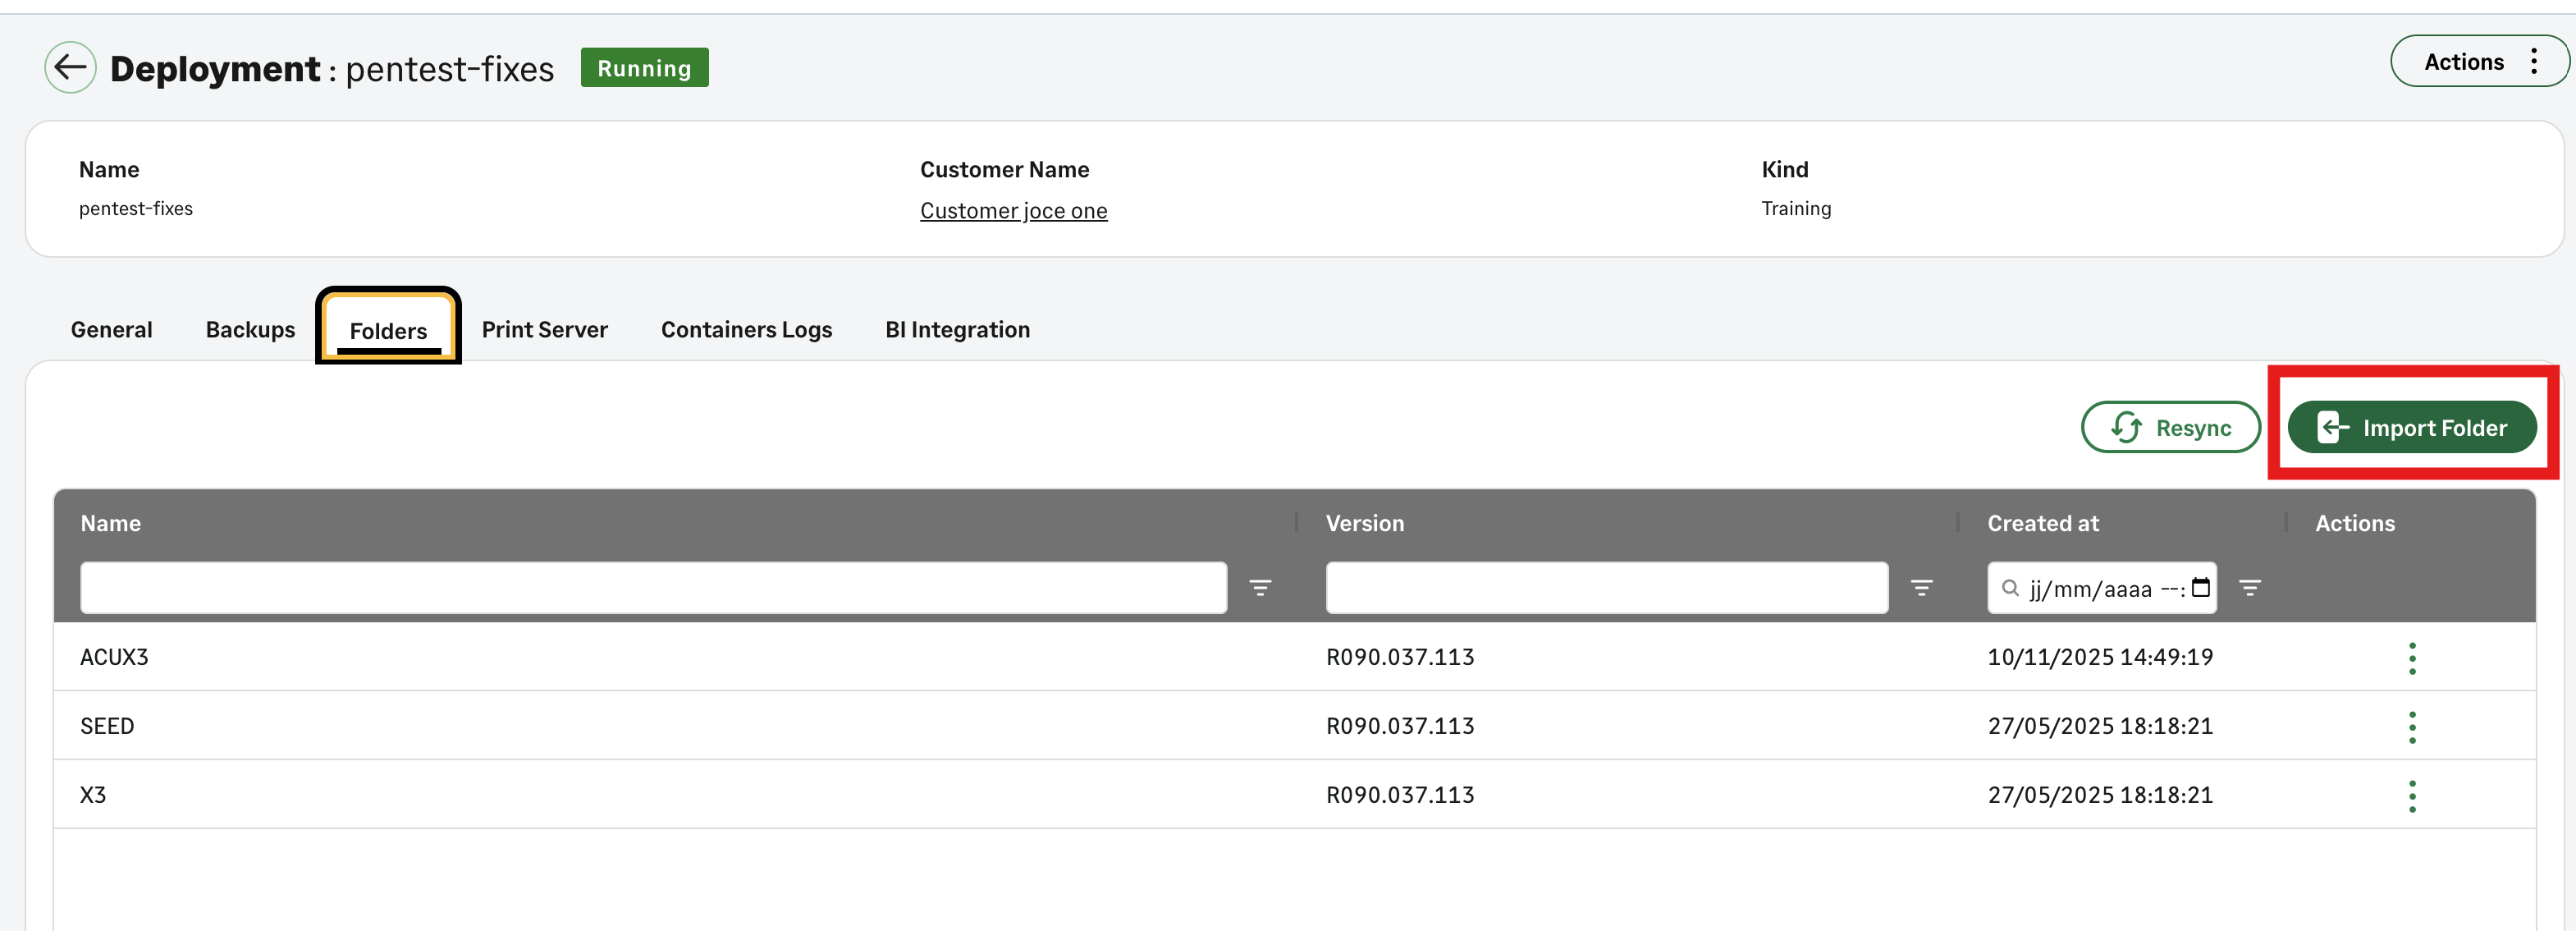
Go to the Folders tab.
-
Select Import Folder.
 Note:
Note:This button is only visible if the deployment status is Running.
-
A confirmation window opens:
-
Set the Target folder name (where the folder will go).
-
Set the SVG folder name. By default it is set as "SVG", but you can manually change this name.
-
Select your ZIP file.
-
Click Confirm to start the import process. You can track the import progress on the Operations page.
-
-
If your imported folder does not come from a Cloud deployment, you need to follow the next step to finalize the upload.
Finalize in X3
This step is required if your folder does not already include the X3 user ADMV2.
If you do not have an X3 ADMV2 user, you can create one.
If you imported your folder from a source outside of the X3 Cloud portal, you need to import the ADMV2 user:
Before you follow these steps in Sage X3, make sure you are logged into the deployment environment in X3 Cloud portal.
-
Open Sage X3.
-
Go to Setup > Users.
-
Select the ADMV2 user.
-
Use the Copy button to the top right of the page.
-
Select the origin folder.
-
Select the destination (import) folder.
-
Select OK when you are ready to copy the user to the new folder.
We advise you restart your X3 deployment to make sure the endpoint is created (Deployments > select the deployment > More actions > Restart). The system (Syracuse) will automatically create the new endpoint for the imported folder.
See import logs
When you import a folder, the system generates log files that you can use to review the import steps or diagnose issues.
The logs are available in your FTP directory under: /<deploymentId>/Full_X3_Import/logs/<importName>.log.
<deploymentId> is the ID of your deployment.
<importName> is automatically generated using the folder name and the date and time of the import.
You can download and open this file from your FTP client to view detailed import operations and error messages.
How to export a folder
You can export an X3 folder directly from the X3 Cloud portal. The export generates a ZIP file containing the full content of the folder. Once the export is complete, the file becomes available in the deployment’s FTP directory.
-
Go to Deployments.
-
Select a deployment.
-
Go to the Folders tab.
-
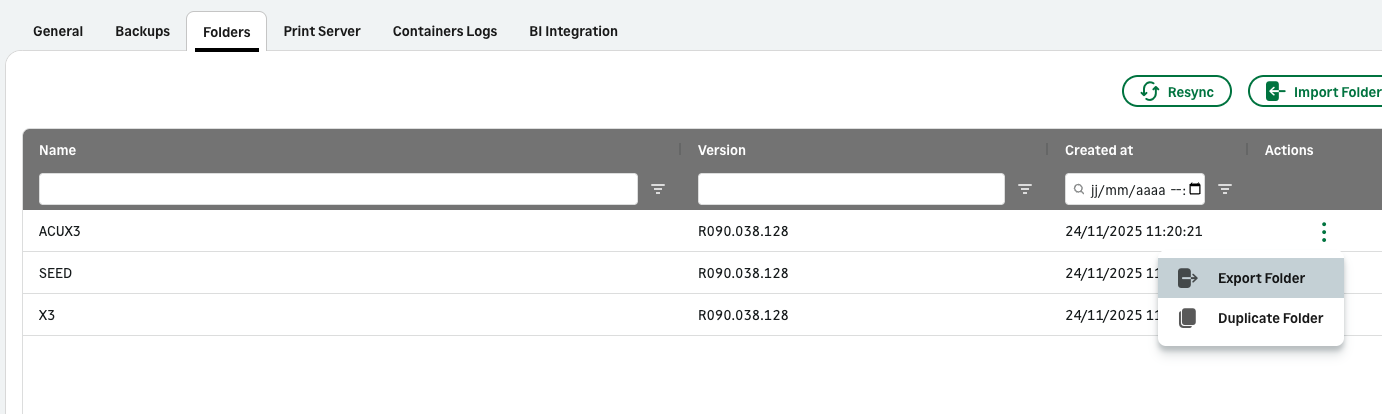
Select the More actions icon on a folder line and select Export Folder.
-
When you are ready, select Confirm export folder to start the export process. You can keep the default options. You can track the import progress on the Operations page.
When the export process is complete, the file will appear in the FTP directory of the X3 deployment in the Full_X3_Export directory. See Connect to an FTP for more information on FTP endpoints.
How to duplicate a folder
-
Go to Deployments.
-
Select a deployment.
-
Go to the Folders tab.
-
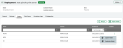
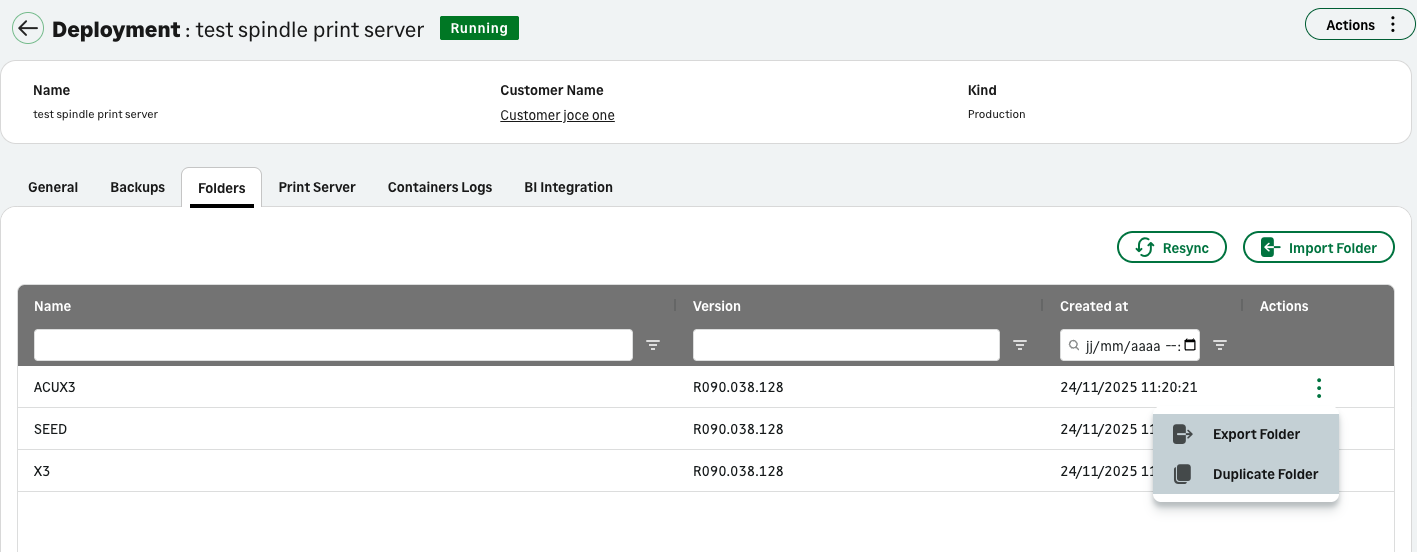
Select the More actions button on a folder line and select Duplicate Folder.
-
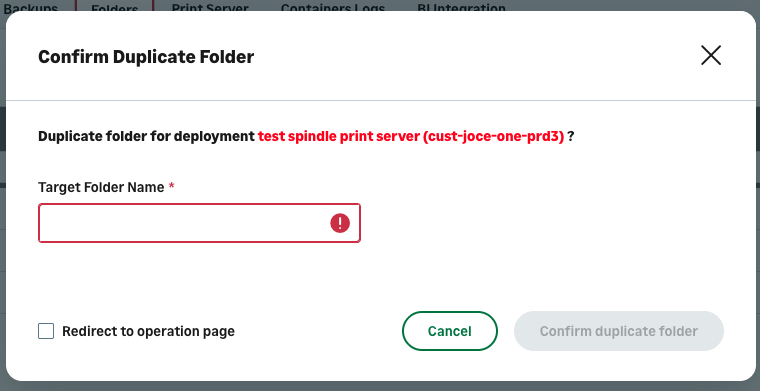
Enter a name for the new folder.

-
When you are ready, select Confirm duplicate folder to start the process.
When the folder is created you will need to create the endpoint.
To create the endpoint, restart the X3 deployment (Deployments > select the deployment > More actions > Restart). Syracuse will automatically create the new endpoint upon restart.
Troubleshooting
Sitemap loading failed
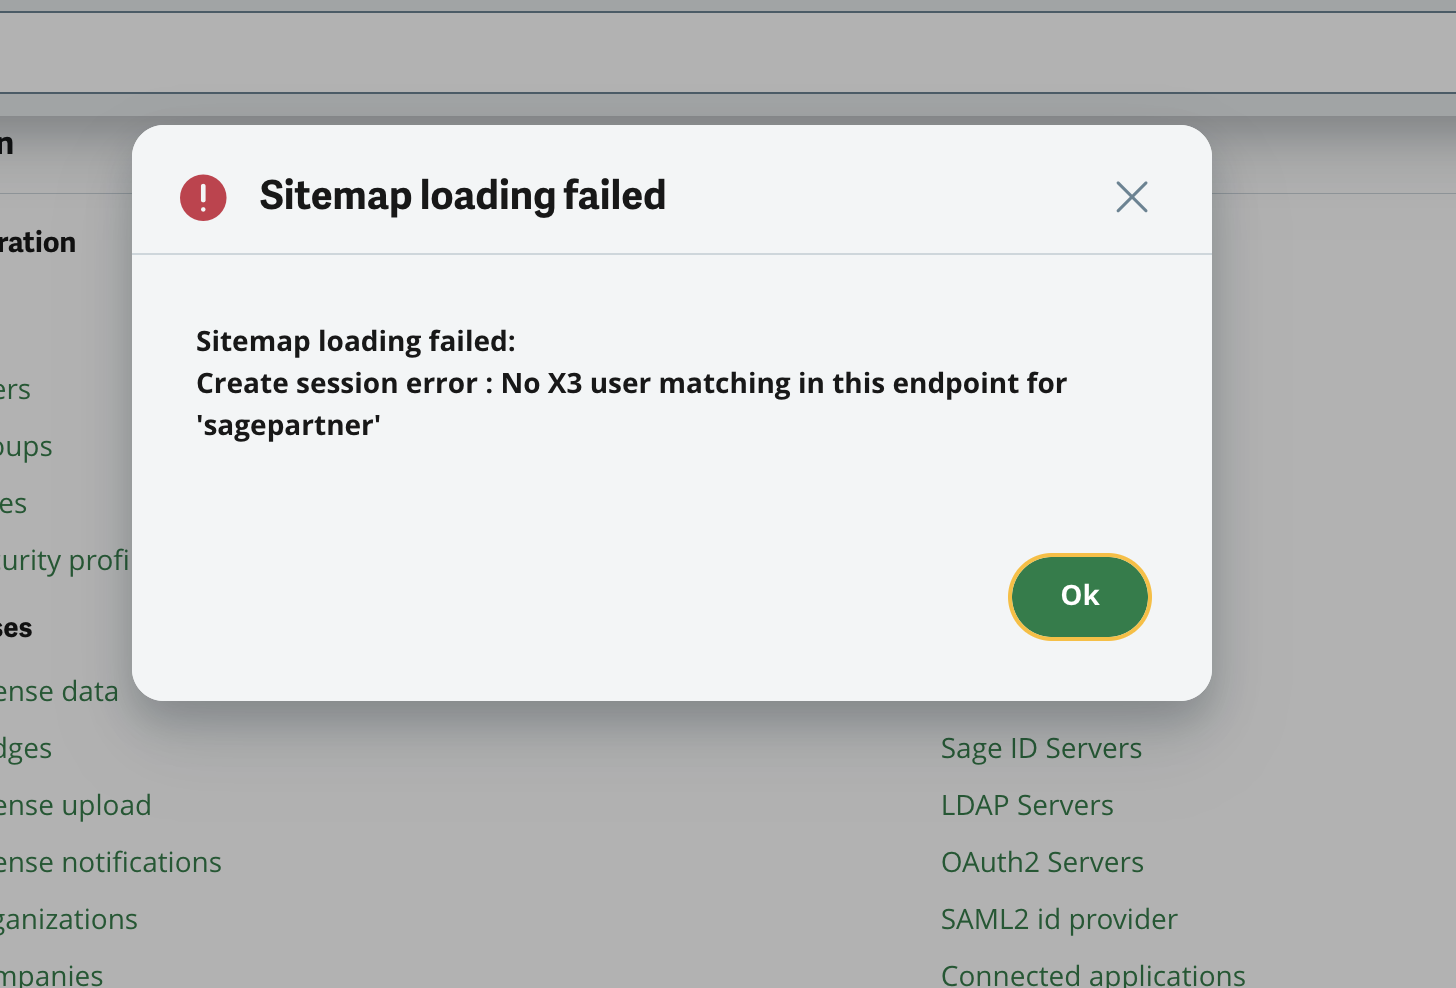
If you encounter this error when trying to log into the endpoint, you need to edit your user endpoint mapping to add the new folder in the administration user page.
Make sure your partner user is using an AMV2 X3 user code.
How to export X3 landing pages customizations
You can transfer your Sage X3 landing page customizations into the X3 Cloud portal to keep a consistent user experience across environments.
The steps below guide you through preparing your custom content in X3, exporting it, and importing it into the X3 Cloud portal.
Export from Sage X3
Before you start
When you create the menu items, make sure they share a common prefix (for example, XA).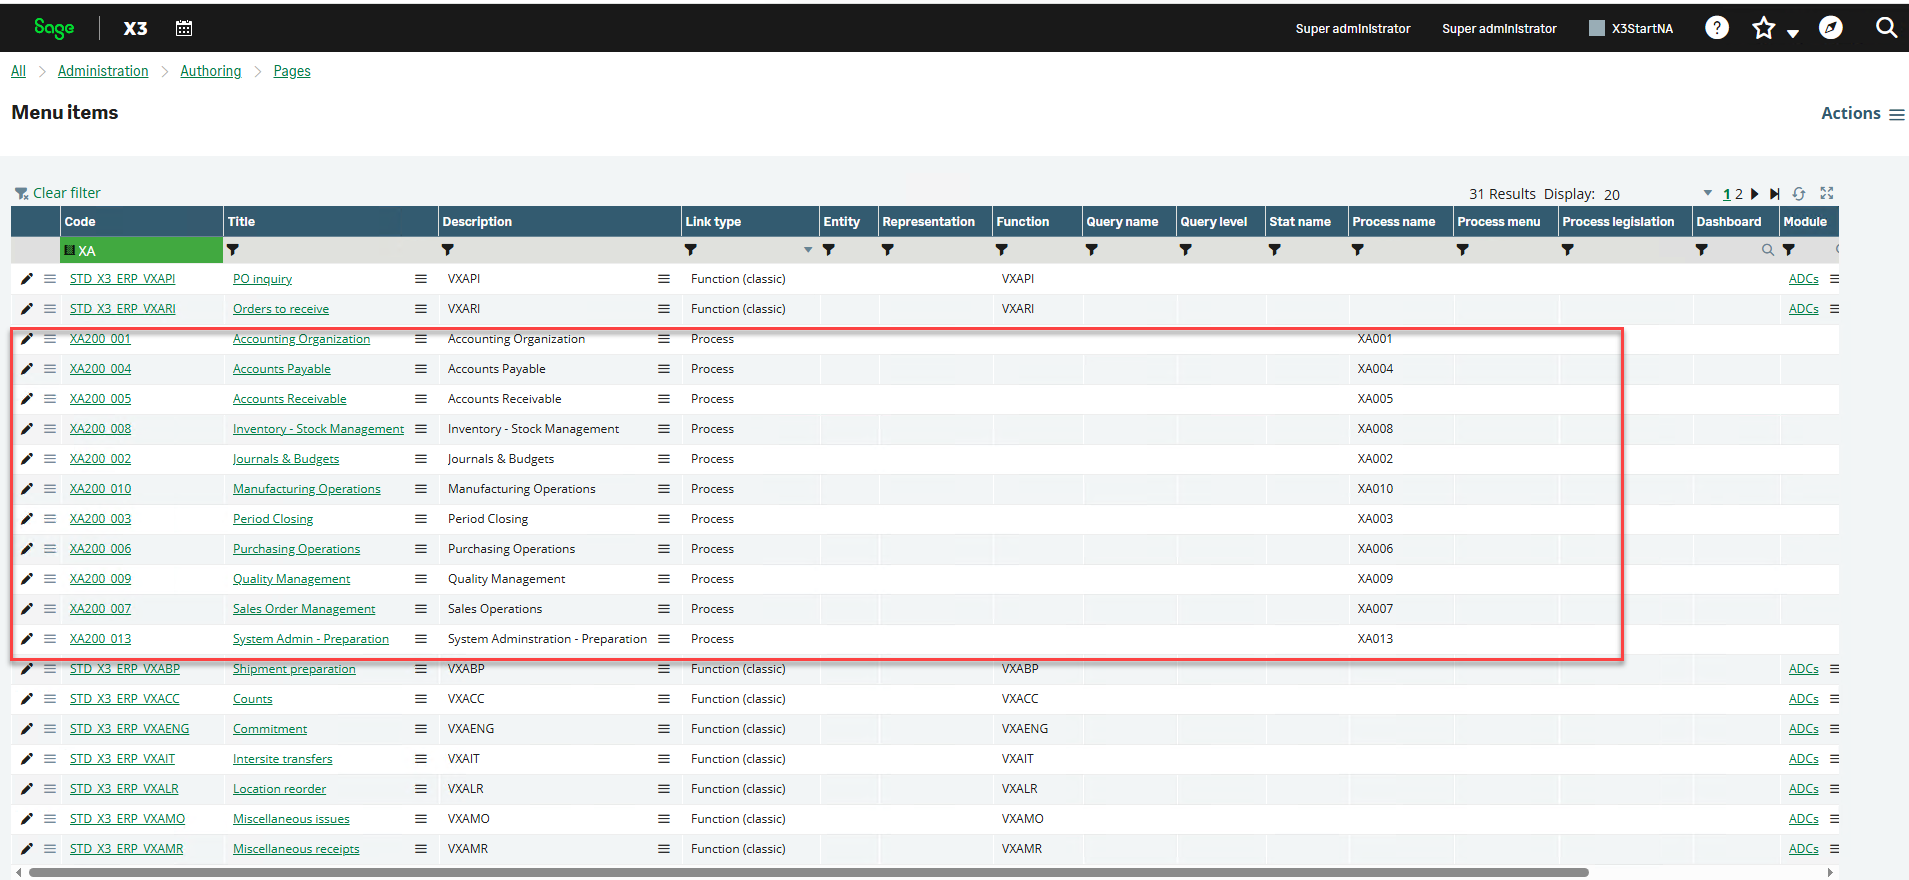
Use the same prefixing convention for Home Pages, Navigation Pages, and any other related objects.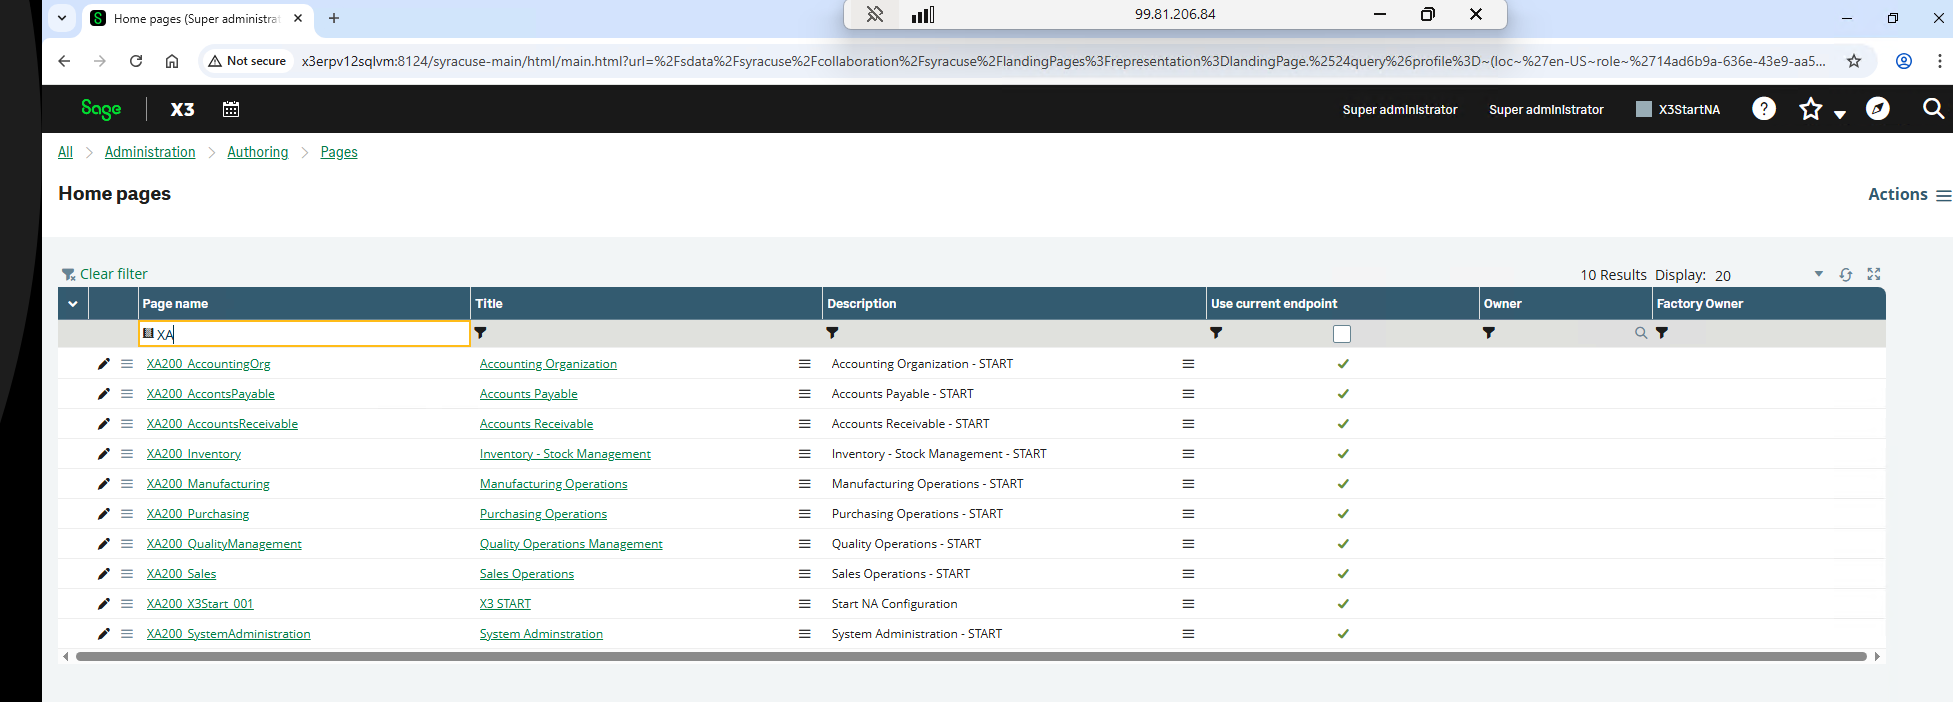
Create your customization record and apply filters
-
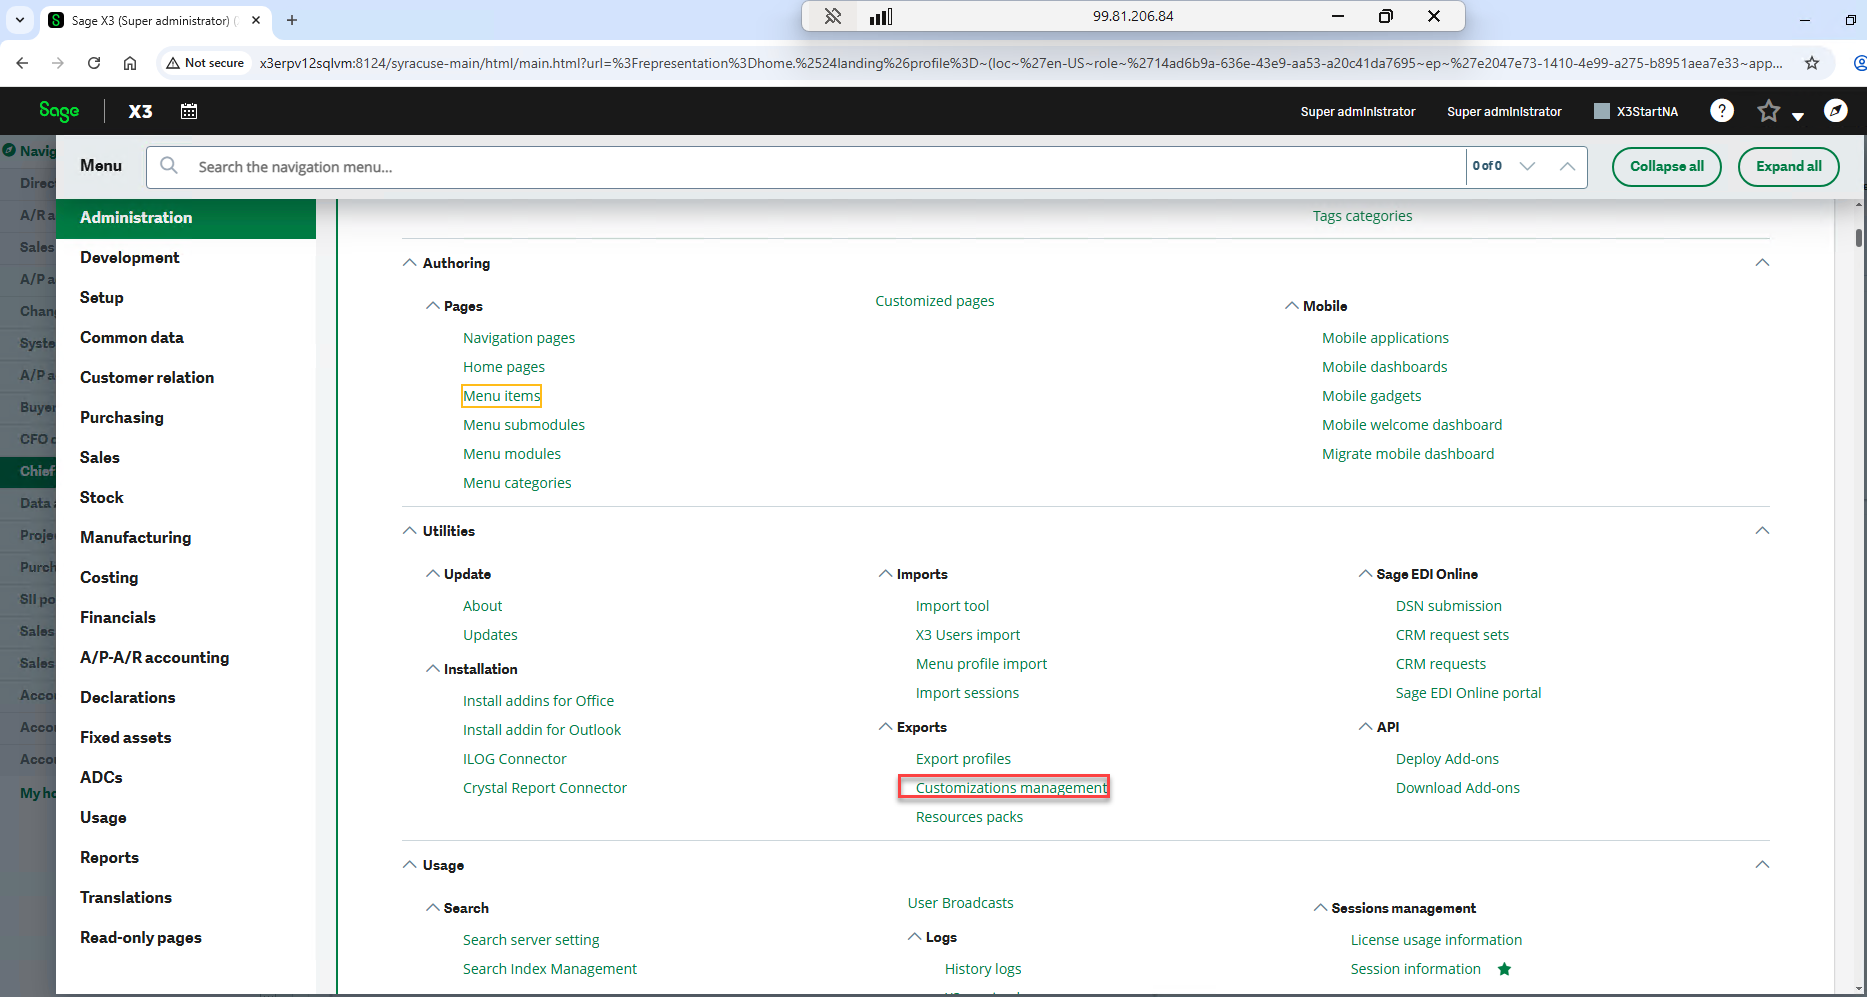
Go to Administration > Utilities > Exports > Customizations management.

-
Select Actions and choose New customization. You can also open an existing customization from the list.

-
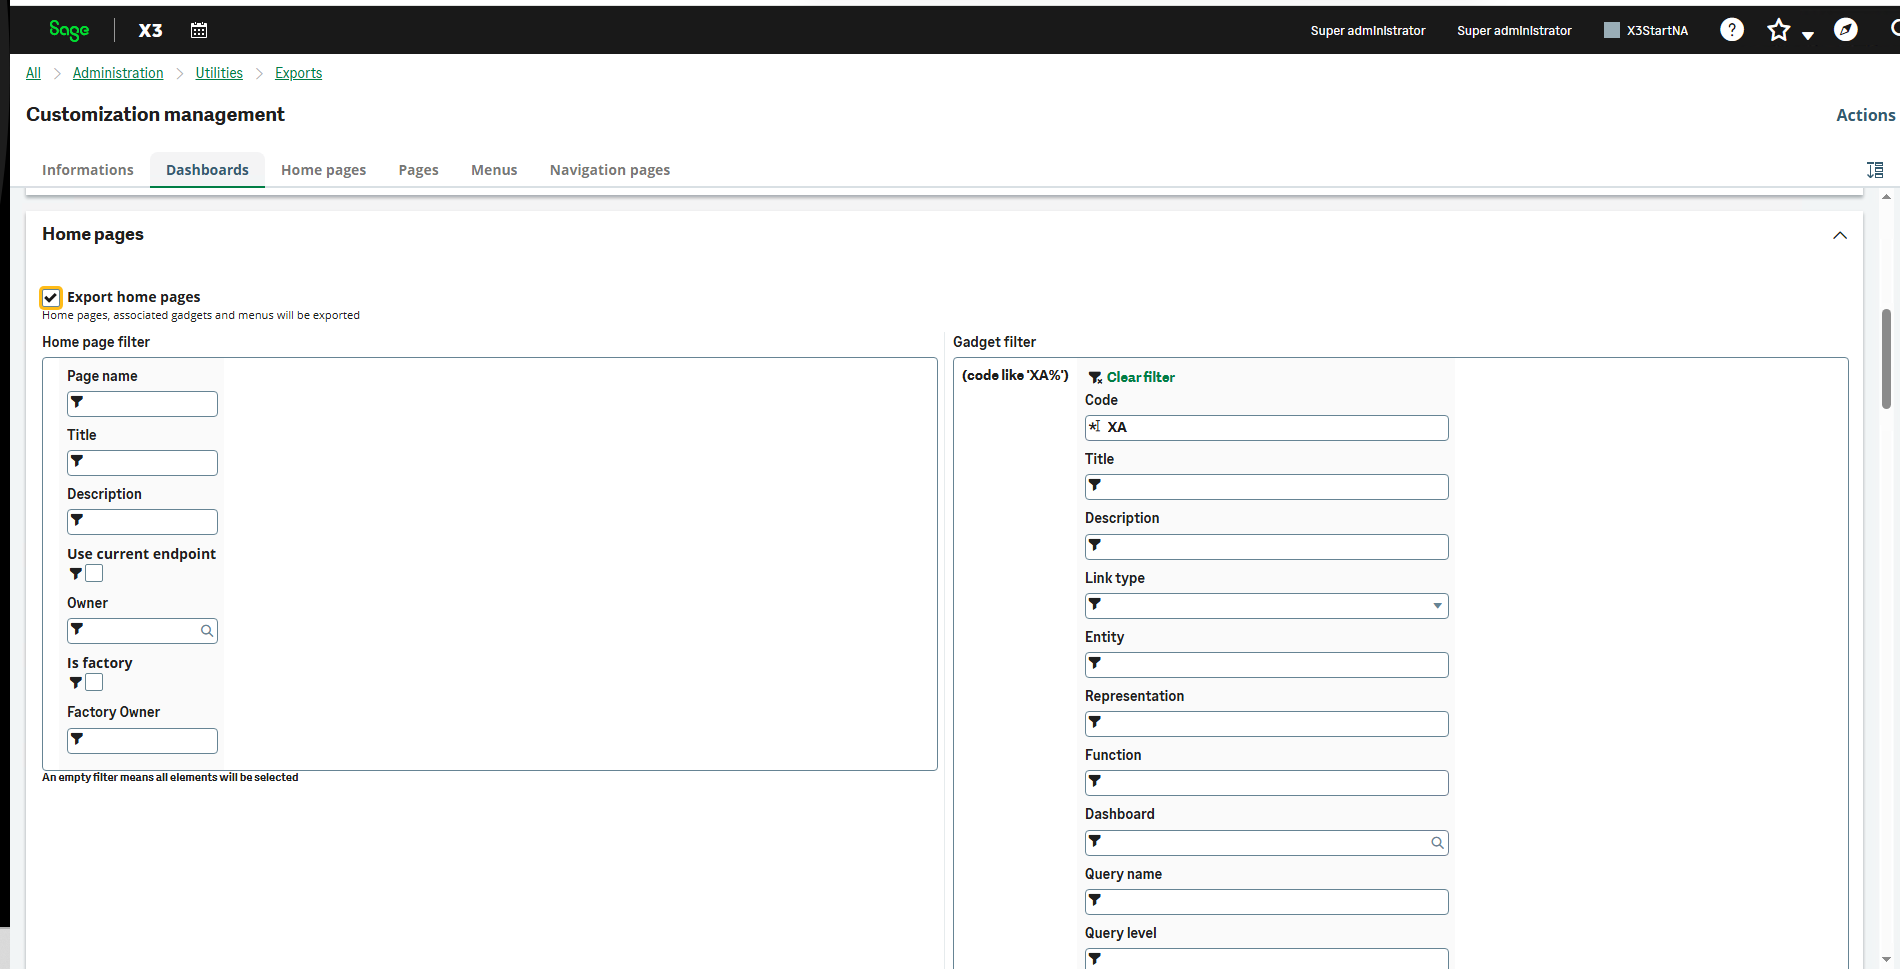
Enable the Export home pages filter.

-
Select Actions and choose Save.

Export your customization record
Once your configuration is complete, you can export the customization as a JSON file.
-
Go to Administration > Utilities > Exports > Customizations management.
-
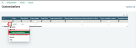
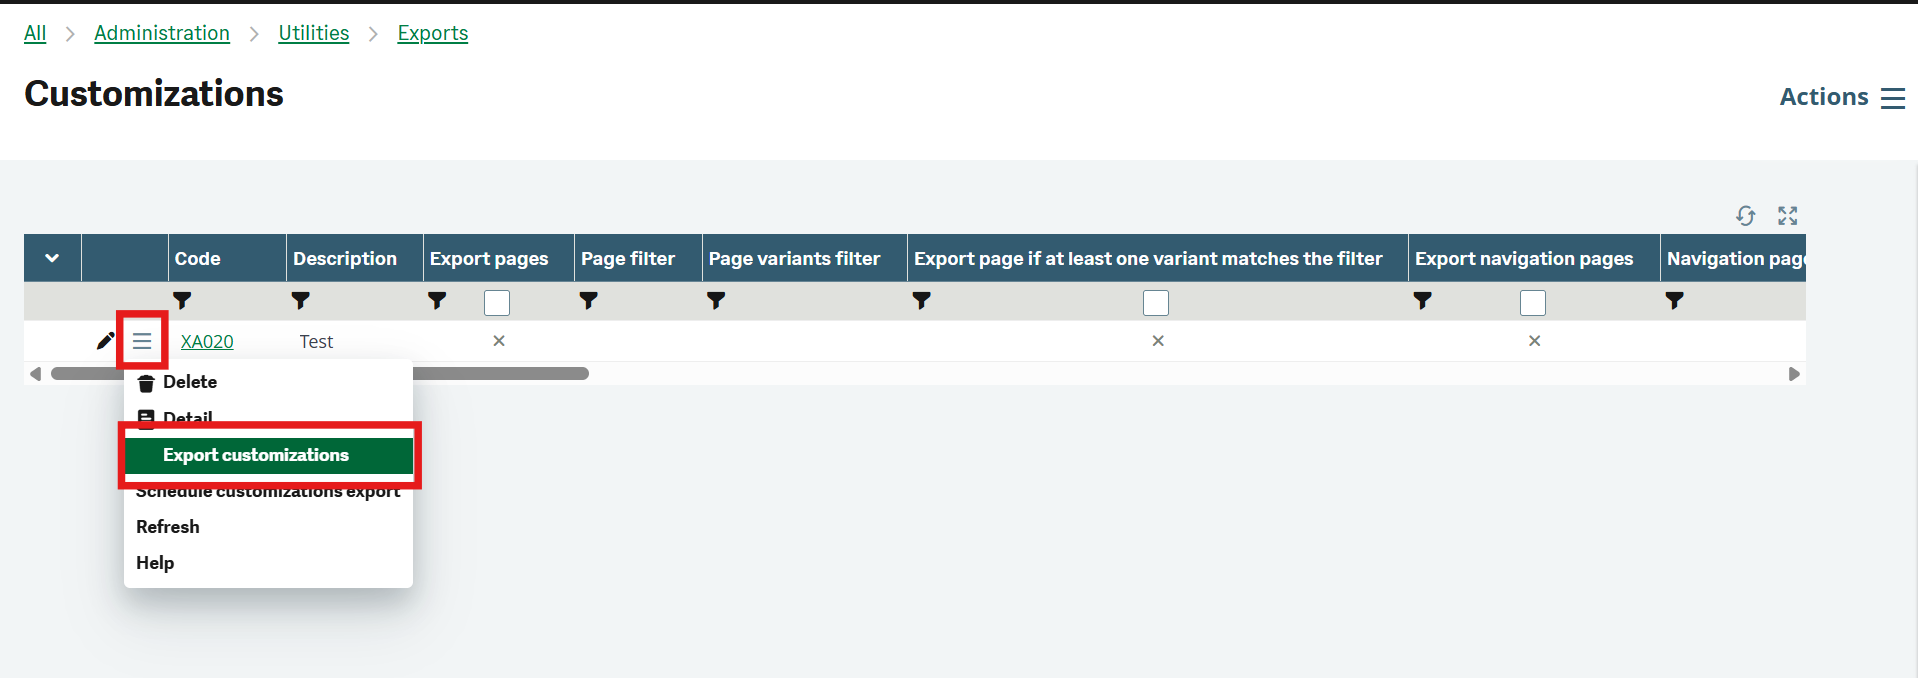
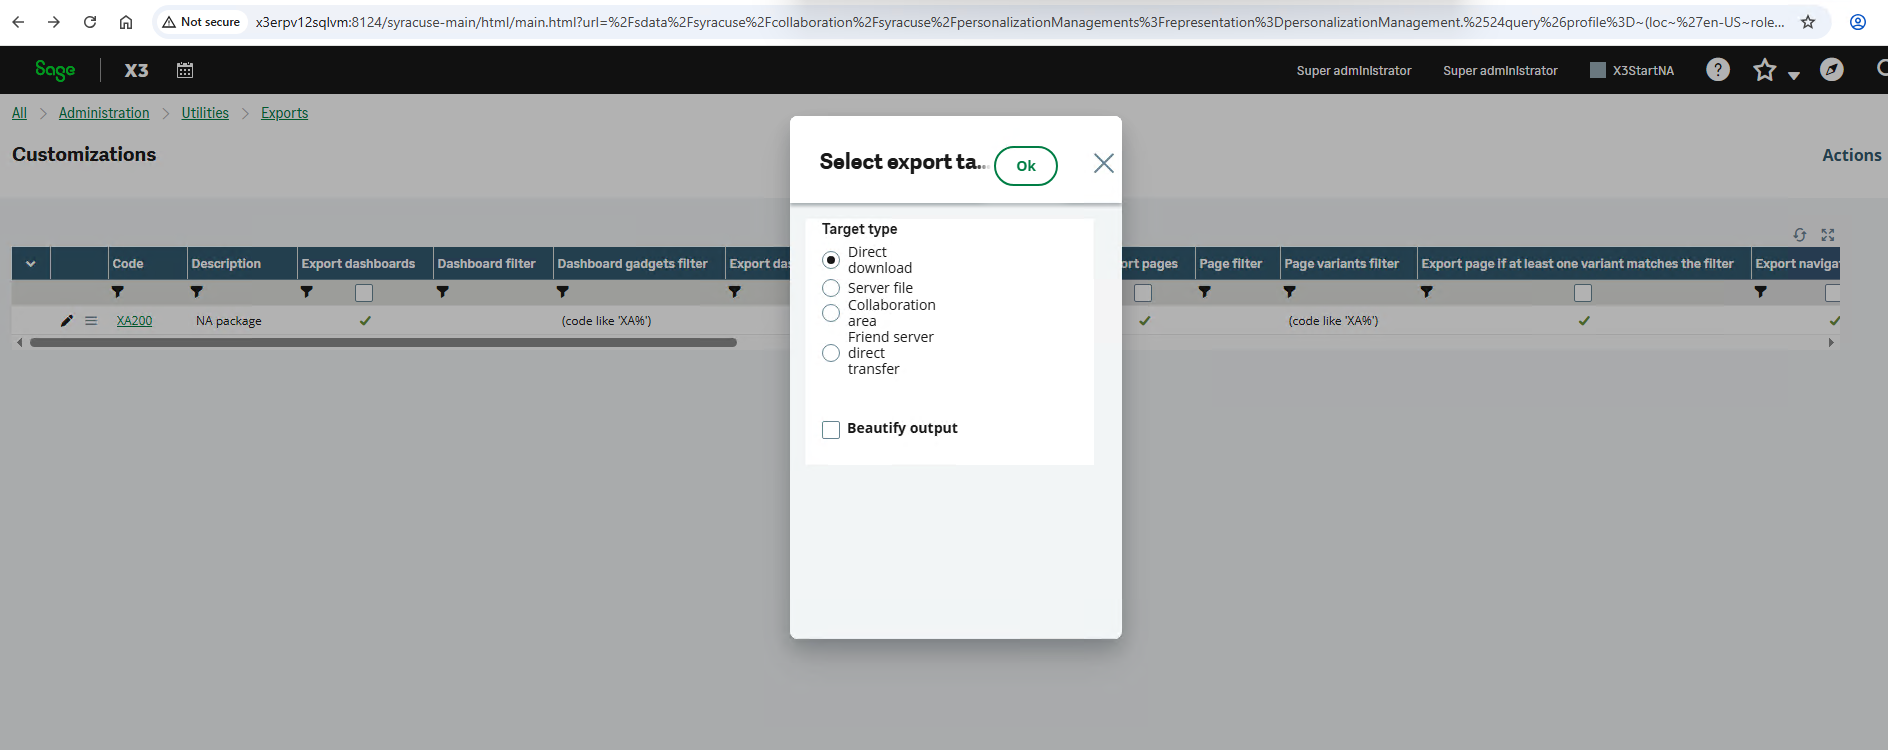
Select the Actions button to the left of a customization line and choose Export customizations.
-
Select Ok.
-
You can now download your customization record.
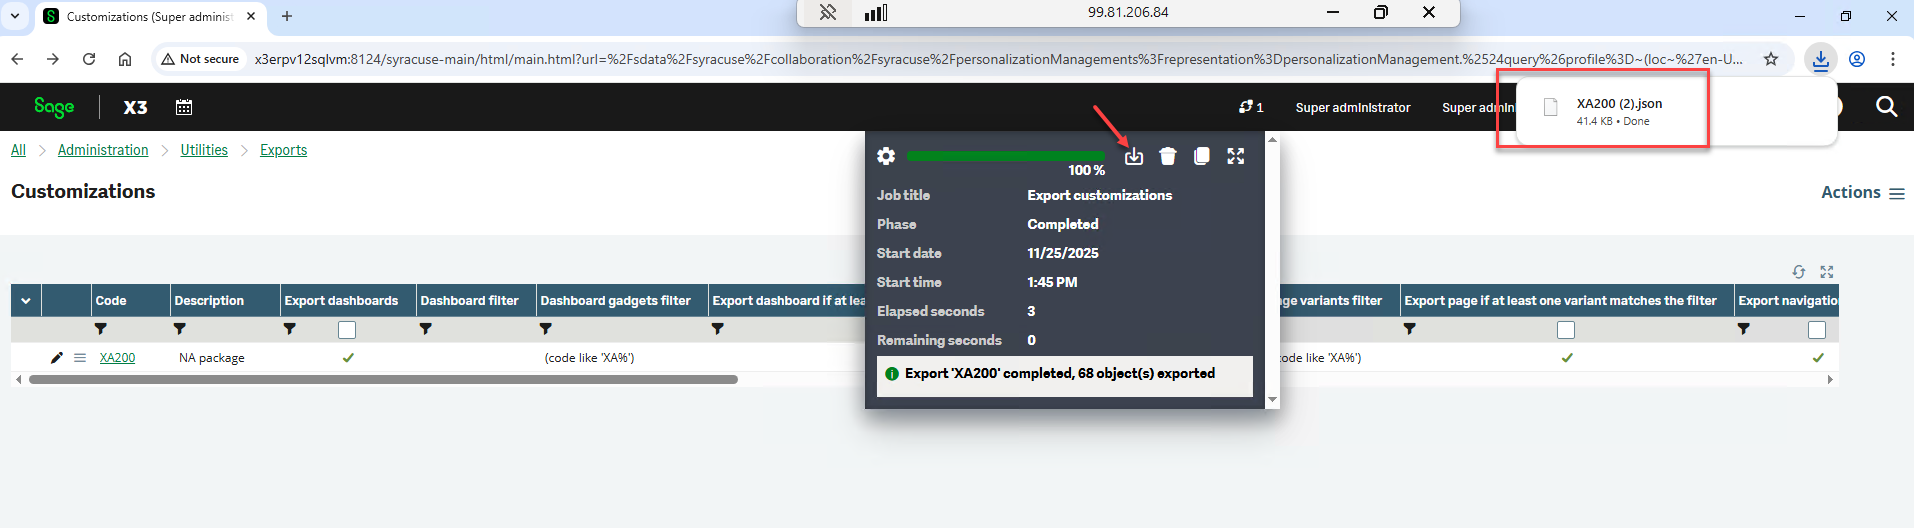
This file will be used to import your custom landing pages into the Cloud Portal.
Import into the target X3 deployment
Once you have exported your customization package, you can import the JSON file into your newly provisioned X3 folder using the Syracuse administration menu. This ensures that your landing pages, menus, dashboards, and related components are transferred correctly into the Cloud Portal environment.
-
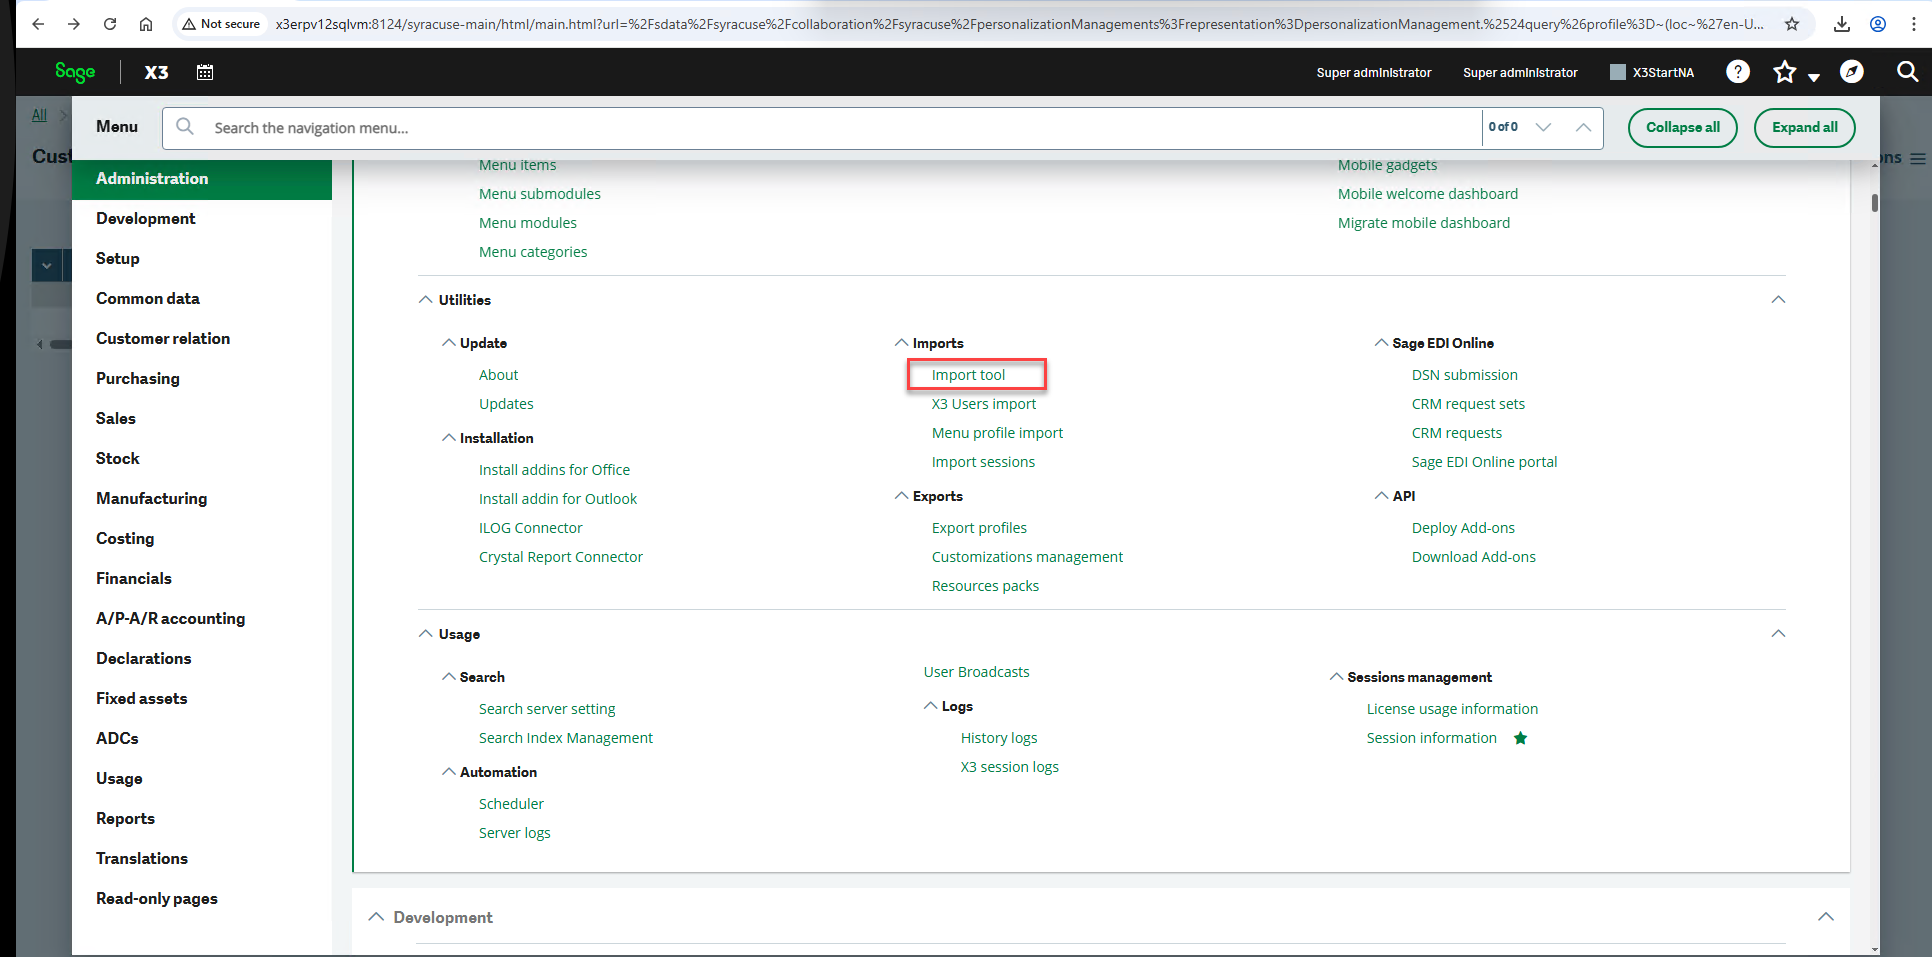
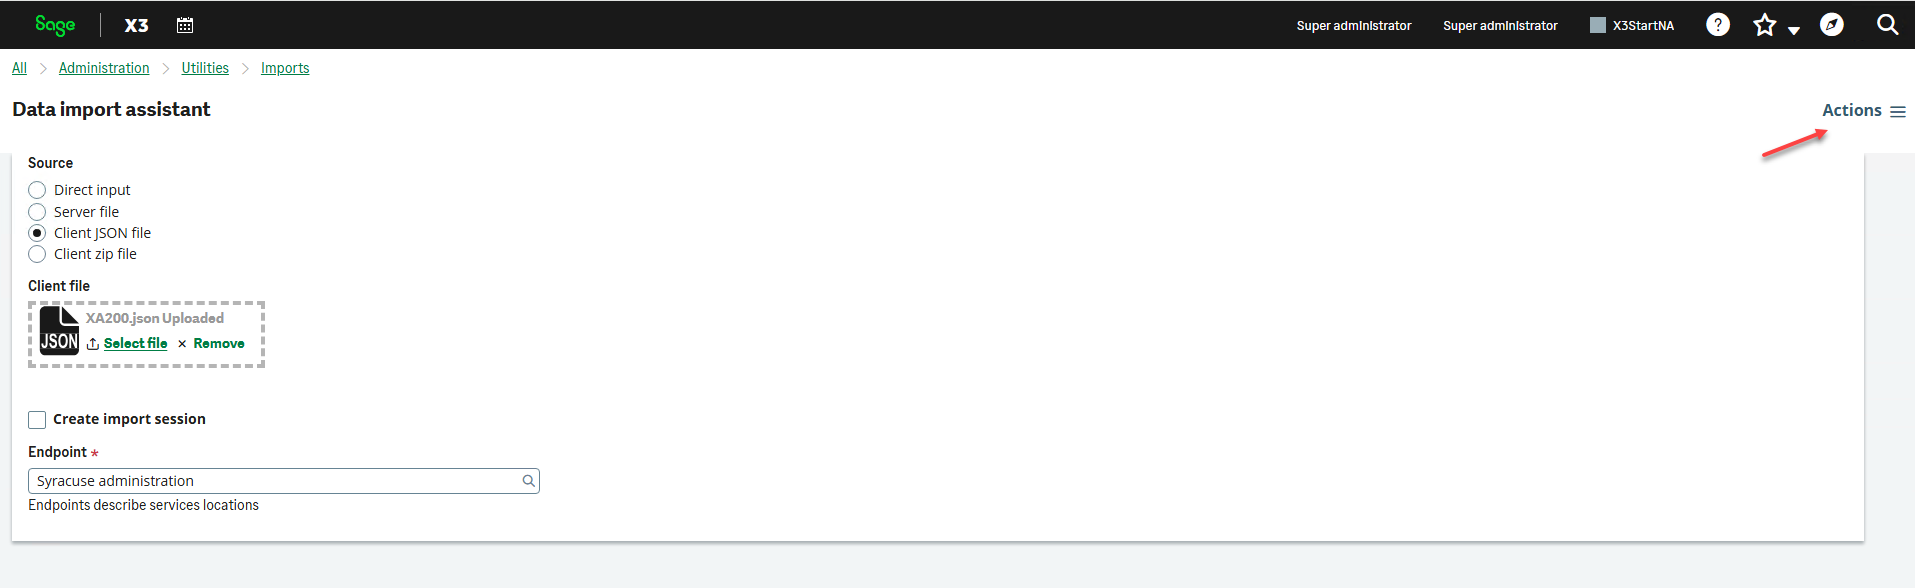
Go to Administration > Utilities > Imports > Import tool.

-
Select Client JSON file as the source.
-
Under Client file, drop or upload the JSON file you previously exported.
-
Under Endpoint, select Syracuse administration.
-
Once the file is loaded, use the Actions button and select Import.
Your landing page customizations will then be available directly in the Cloud Portal.